Writing atomic commits
What is an atomic commit?
In the context of Git, an atomic commit refers to the practice of creating commits that are self-contained and independent units of work. It means bundling the changes related to a logic change into a single commit, making it the smallest possible unit.
Changes in the same file could belong to different logical changes, you should bundle them into different commits. Each atomic commit represents a complete change that is capable of passing the Continuous Integration (CI) process. In other words, if you need more than one commit to pass the CI, those commits are not atomic.
Why is atomic commit a good practice?
👍 Reason #1: Reversibility
With atomic commits, it becomes easier to reverse a particular commit instead of reverting the entire pull request. Since each atomic commit represents the smallest set of related changes, you can use the git revert command to create a new commit that explicitly reverses the problematic commit.
git revert <the-problematic-commit>git revert command creates a new commit which clearly says that it is reverting some previous commit.
👍 Reason #2: Code Review Efficiency
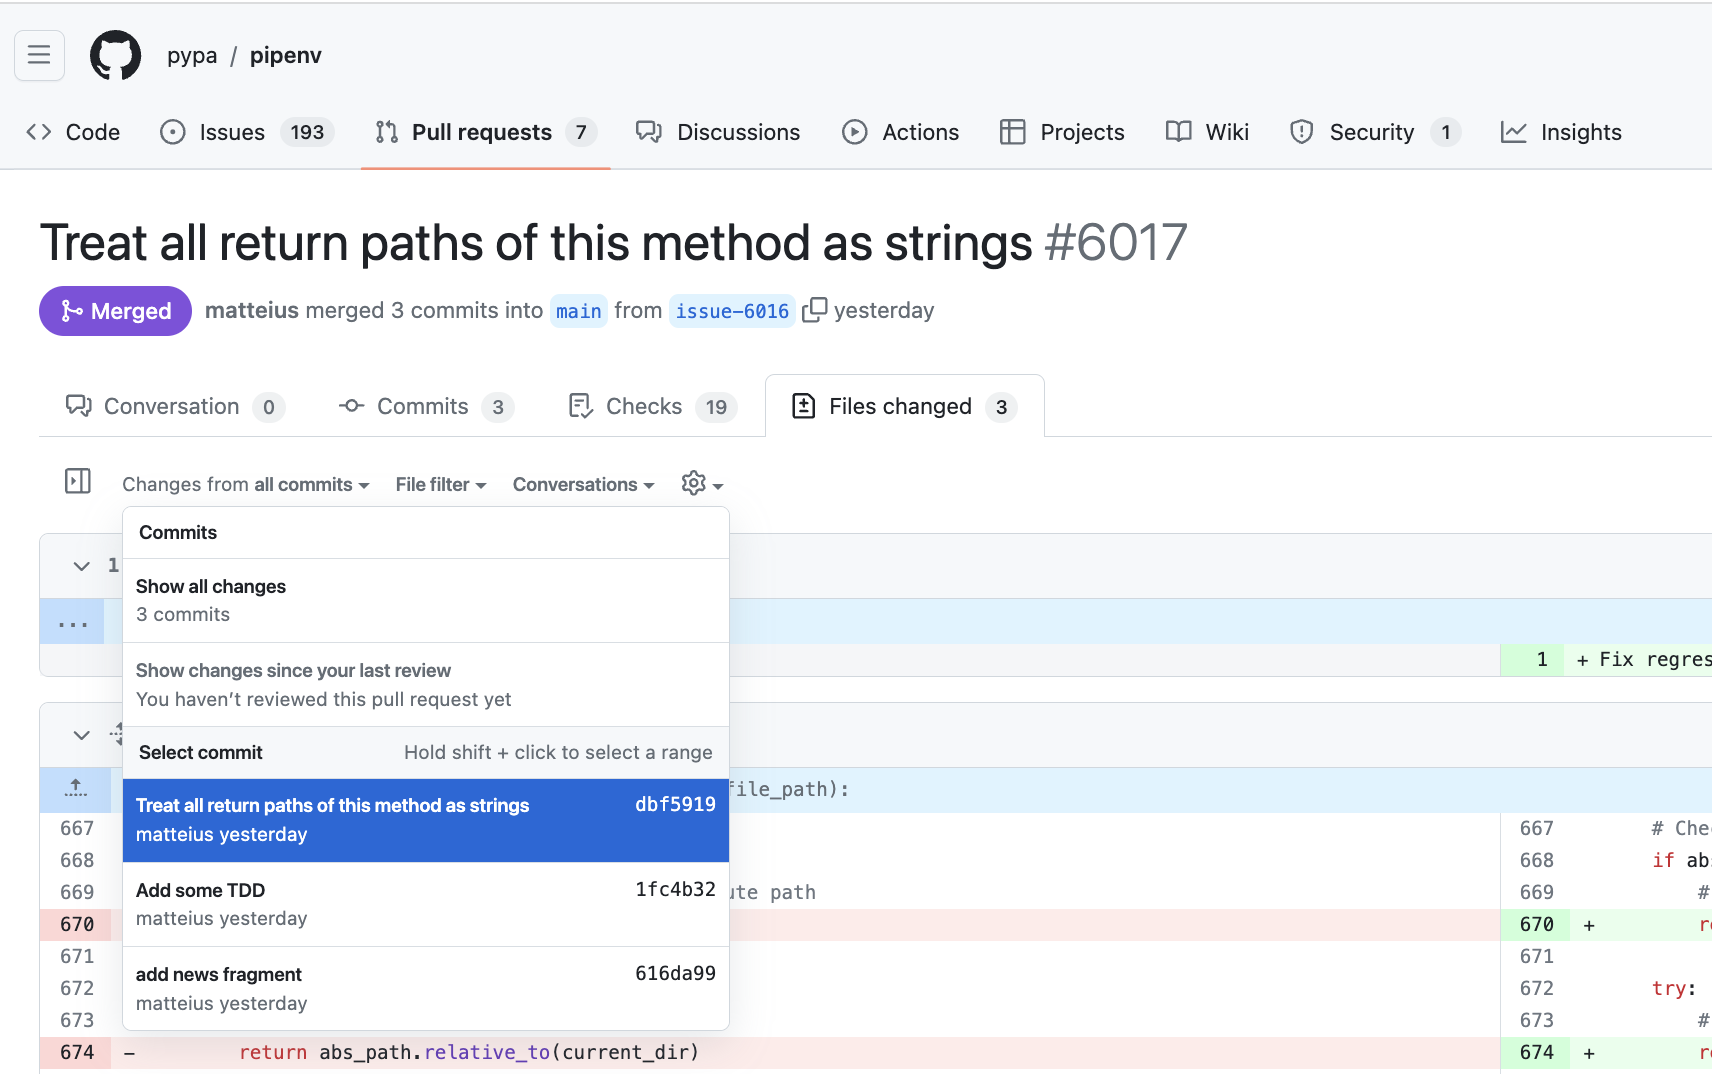
Grouping changes into atomic commits simplifies the code review process. Code reviewers can filter changes by commit on the GitHub UI, allowing them to review logical sets of changes. This makes it easier to understand and dissect the code changes.

Examples to avoid
👎 Messy commits
Messy commit histories are often the result of fast local development. Authors may not know how to rewrite commits or may simply be too lazy to do so. It’s also possible that authors consciously choose to leave the history messy and rely on squash merge to clean up the mess at the end. While this may be convenient for authors, it makes it challenging for reviewers to understand the narrative of the changes when reading the commit history.
Here is an example of a messy commit history:
pick 6a885eb WIP
pick 692f477 Update script
pick b3348a0 Update script again
pick 9512893 Revert script changes
pick 1689371 Empty commit to trigger CI
pick 6af4476 Update temp
👎 Gigantic Commit(s)
Gigantic commits are often the result of simply squashing changes into one commit before creating a pull request (with the good idention of cleaning up the mess in the previous example), even if the changes are massive. While it looks cleaner to have only one commit to review, it is actuall not helpful for the review process and it should also be considered as an anti-pattern.
How to approach atomic commits
While it’s acceptable to create quick and dirty commits for fast iteration, it’s essential to clean up the commit history into atomic commits. Here’s how you can do it:
1. Reset all commits locally
On the feature branch, run git reset main to unstages all the commits
2. Construct the commit narratives
Think about the change narratives you want to convey to reviewers and future colleagues.
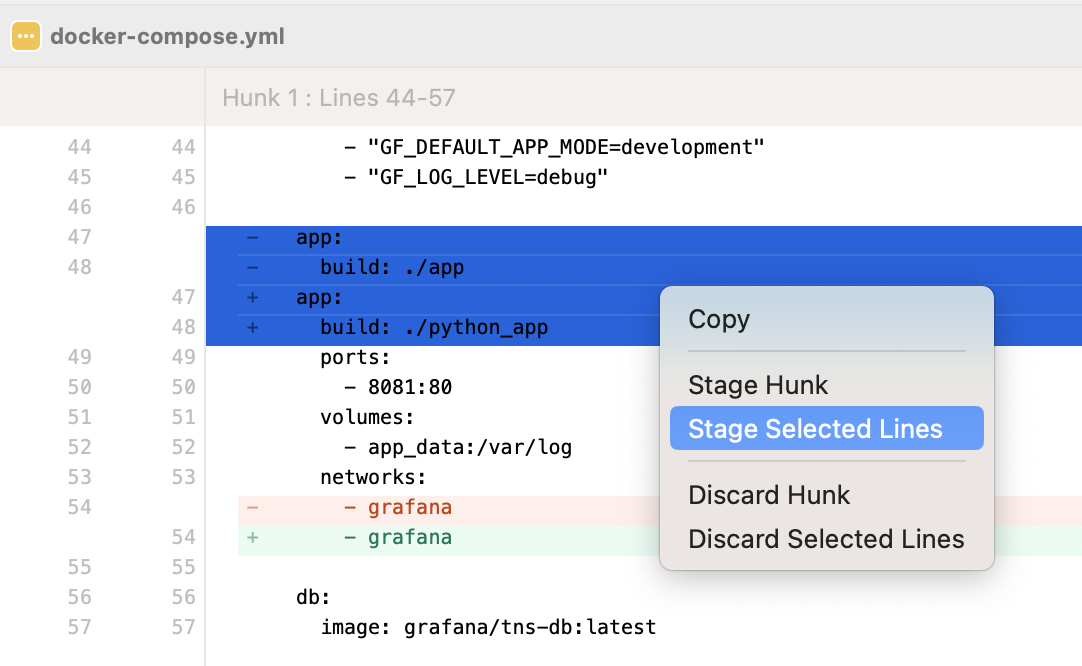
Group the changes into a series of commits, each containing a logical change. GUI Git tools like SourceTree or the source control GUI in Visual Studio Code allows you to stage portions of the same file into different commits. Don’t let your preference for the command-line interface hinder you from choosing better tools.

3. Use a standard commit message format
It’s important to write commit messages in a standard format to convey the message of what and why the changes were made
Format:
<Summarize change(s) in around 50 characters or less>

<More detailed explanatory description of the change wrapped into
about 72 characters>
Example: (copied from here)
commit eb0b56b19017ab5c16c745e6da39c53126924ed6
Author: Pieter Wuille <pieter.wuille@gmail.com>
Date:   Fri Aug 1 22:57:55 2014 +0200

   Simplify serialize.h's exception handling

   Remove the 'state' and 'exceptmask' from serialize.h's stream
   implementations, as well as related methods.

   As exceptmask always included 'failbit', and setstate was always
   called with bits = failbit, all it did was immediately raise an
   exception. Get rid of those variables, and replace the setstate
   with direct exception throwing (which also removes some dead
   code).
You may not need to be as verbose as the example, but you should provide enough information for reviewers and future colleagues to understand the changes.
Occasionally, people adding comments in the pull request to explain the intention of the changes. This may not be necessary if you write clear commit messages.
4. Start with a draft pull request
Always review your pull request before sending it to anyone for review.
Create the pull request as a draft first and skim through the changes using the pull request GUI. It’s not uncommon to accidentally push unintended changes, and a draft pull request gives you a chance to fix them before sending them for review. A pull request in the draft state doesn’t trigger notifications to reviewers, so you won’t waste their time with a potentially unready pull request.
5. Finalize and send for review
Once you’re satisfied with the changes and have made any necessary adjustments, you can finalize the pull request and assign it to the appropriate reviewers